Integration guide - Okta
Okta supports using SCIM to manage users and groups in a configured application. Users can be created, updated, or disabled via the SCIM API (Okta does not support deleting users). For more details, refer to connecting SCIM API to Okta and the Okta SCIM documentation.
Setting up a PactFlow app in Okta
Check out the official Okta guide on connecting the SCIM API!
Configure SCIM provisioning
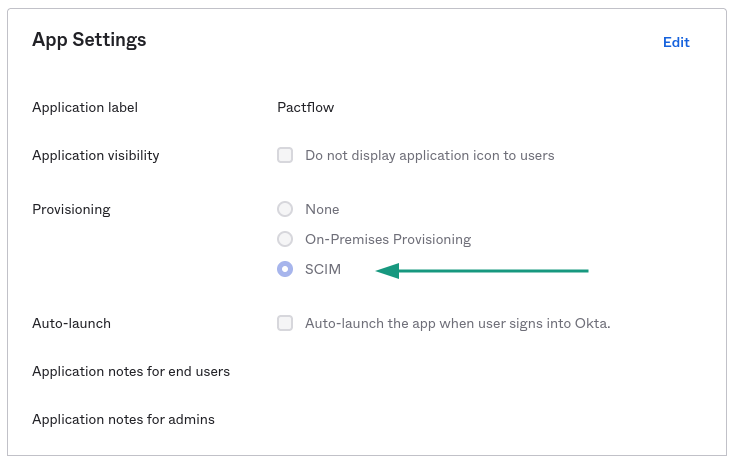
Follow the PactFlow documentation to setup an Okta SAML app. You need to set Provisioning to SCIM under App Settings.
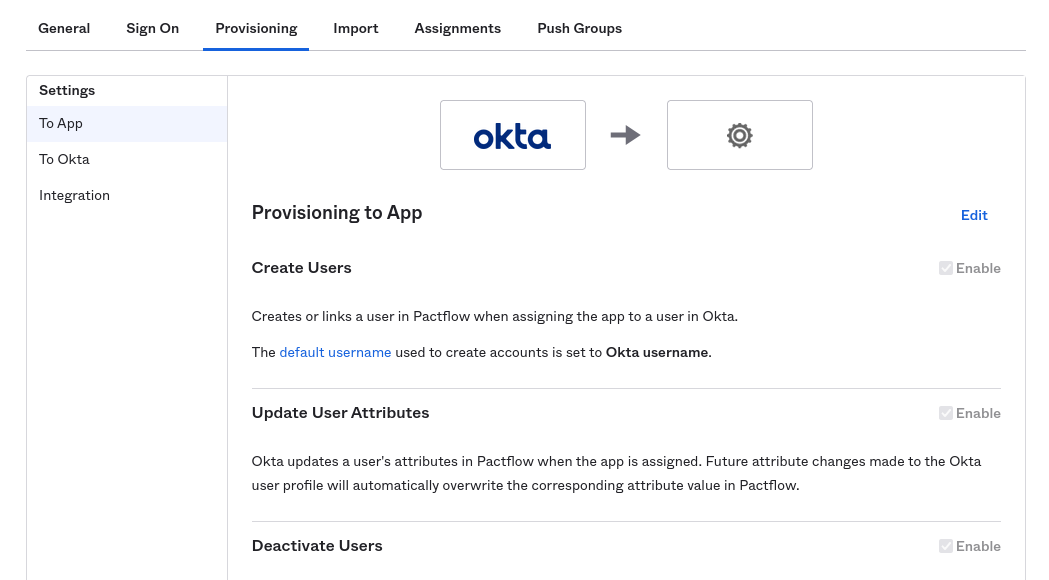
Then, in the application administration settings, select the Provisioning tab. This screen has 3 different settings: "To App" to configure the resources that Okta will send to PactFlow, "To Okta" for importing PactFlow resources into Okta and "Integration" for configuring the integration settings.
Configure the integration
Select the "Integration" item on the left, and then setup the SCIM connection.
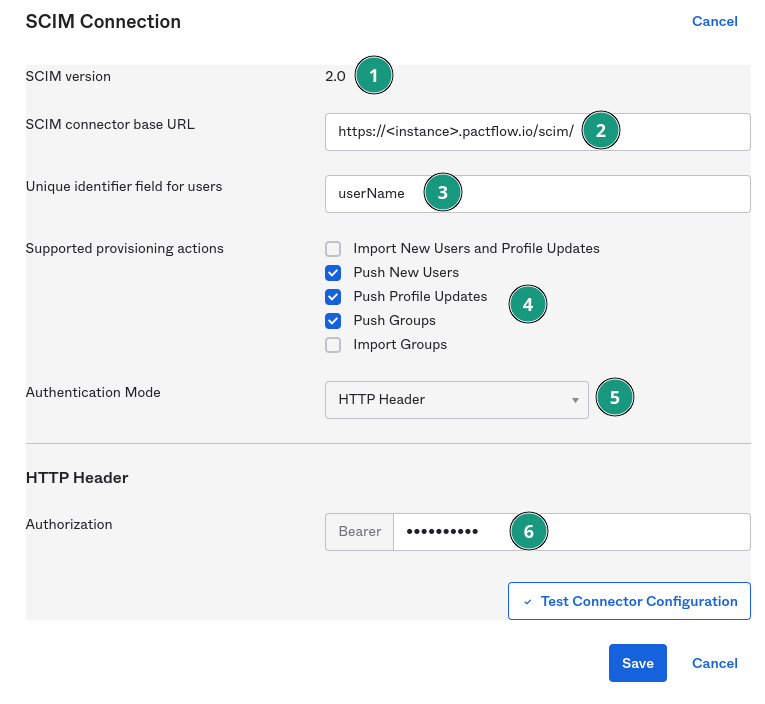
- SCIM version must be set to 2.0.
- The base URL is your PactFlow instance domain with
/scim/appended. Replace <instance> with your actual instance name. - Set the unique identifier to the Okta
userNameattribute. It is important that this value is the same value that is passed in via the SAML authentication call. - Depending on the direction you want resources to flow, select the appropriate checkboxes. You want to push new users, new groups, and profile updates to PactFlow.
- Authentication mode must be set to HTTP Header
- Set the Authorization to Bearer with your PactFlow API token. You should use a PactFlow System Account token for this. The system account must be assigned the SCIM role to be able to access the required PactFlow SCIM resources.
You can now use the Test Connector Configuration button to see if you have the values correctly setup.
Mapping Okta groups to PactFlow teams
Okta groups can be setup to sync with PactFlow as Teams. Then any user added to the Okta group should automatically be added to the corresponding team in PactFlow (if the user has been correctly synced).
- Create the group in Okta.
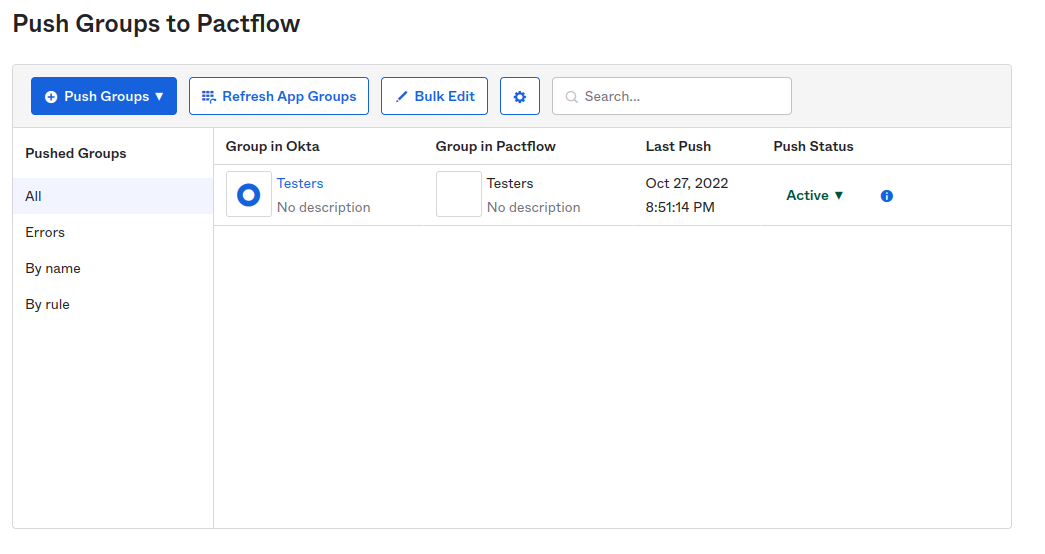
- Assign the new group to the PactFlow application. This can be done in either the group's Applications tab, or in the PactFlow application's Push Groups tab.
- You can test the sync in the PactFlow application's Push Groups tab.
Mapping Okta users to PactFlow users
Okta users can be synced to PactFlow by assigning them to the PactFlow app (either directly or via a group assigned to the PactFlow app). You will have to configure the attributes that get mapped to the PactFlow ones (see PactFlow User attributes) in the To App settings of the PactFlow application.
The required attributes to be set are as follows:
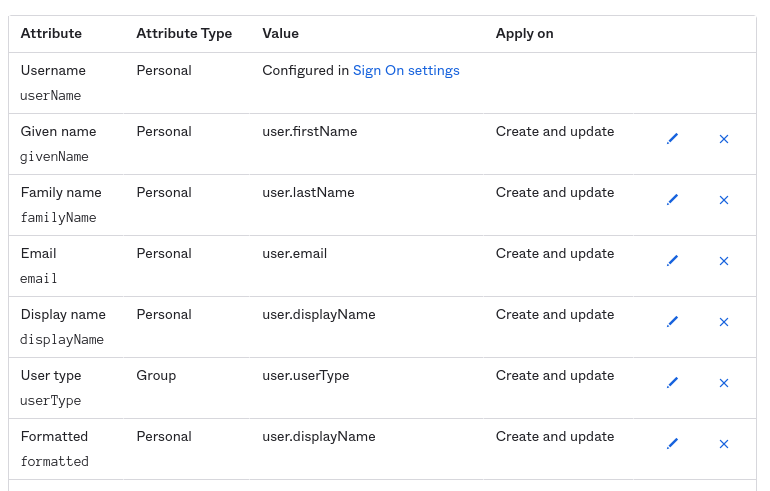
Note: The profile attributes can come from both the user's profile and the profiles of the groups they belong to.
Configuring user roles
Okta does not support user roles. To get users to have the correct assigned roles, you can either use the default role setting in PactFlow to assign a role when the users are created, or you will have to follow the Okta knowledge base articles: How to Pass Multivalued Attributes in SCIM User Object and How to add multi-value roles in SCIM Cloud integration.
In essence, for each role you want assigned, you will need to:
- Create an attribute for the role in the PactFlow App Profile using the steps outlined in the knowledge base articles above. Pay special attention to the expressions that the attribute requires.
- Create an attribute (for either a Group or User profile) in the Okta profile attributes for the role. Assign the role
UUID value to this attribute. You can get the role UUID from either the PactFlow Role screen by editing the role and
copying the UUID from the URL or from the PactFlow API browser (click on the API button at the top right of the
PactFlow dashboard and then follow the
pf:admin-roleslink). - Map the Okta attribute to the PactFlow app attribute via the To App attribute mappings.
Role Example
For example, let us setup an Admin attribute that grants any user it is assigned to the Administrator role in PactFlow.
- Create an attribute in the PactFlow app that targets the Administrator role. This is in Directory -> Profile Editor -> PactFlow App Profile (or whatever name you give the app).
- Set the External name to
roles.^[type=='Administrator'].value. - Set the External namespace to
urn:ietf:params:scim:schemas:core:2.0:User. - Set the attribute type depending on if you want to assign it directly to a user or via a group they belong to.
- Make sure to set Mutability to
READ_WRITE.
Once created it should look something like:

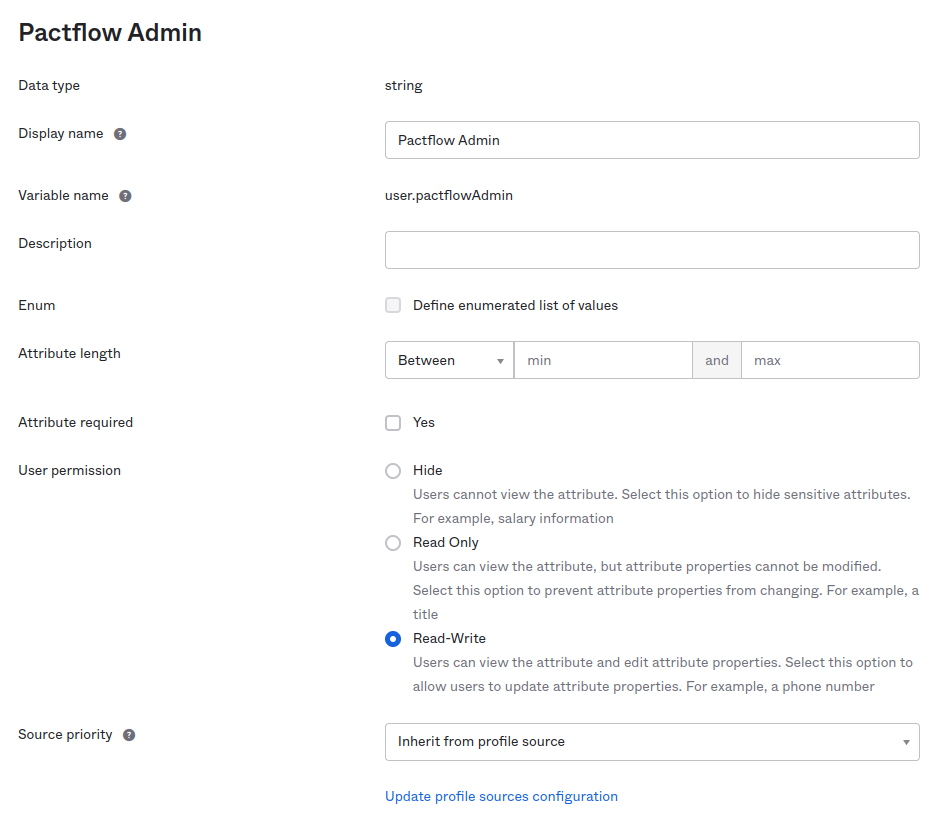
Now, we need to create an Okta user attribute for the admin role.
- Go to Directory -> Profile Editor -> Okta User
- Create a PactflowAdmin string attribute.
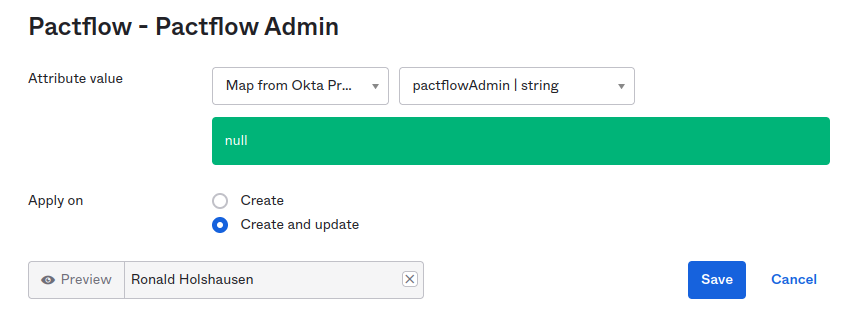
Next, we need to map the two attributes via the PactFlow app settings in the To App screen.
- Select the attribute from the list of un-mapped attributes.
- Set the Attribute value to
Map from Okta profile. - Choose the attribute we created above from the dropdown (
pactflowAdmin). - Set Apply on to
Create and Update.
Now we just need to assign the PactFlow Administrator role UUID value to a user via their profile. When they sync, they will get the administrator role. Using the PactFlow API browser, I found the Administrator role UUID is
cf75d7c2-416b-11ea-af5e-53c3b1a4efd8. Find the user you want to assign (Directory -> People) and edit the attribute
in their Profile.

It should sync as soon as the profile is updated. If it does not, you can use the Force Sync button in the PactFlow App Provisioning settings.
You will have to repeat this process for each role you would like to assign.