Authentication
This article applies to accounts that use Cognito for authentication. It includes all accounts before Dec 11th, 2023. For customers on SmartBear ID see this guide.
To determine which authentication mode is enabled on your account, consult the following table:
| SmartBear ID | Cognito | Both |
|---|---|---|
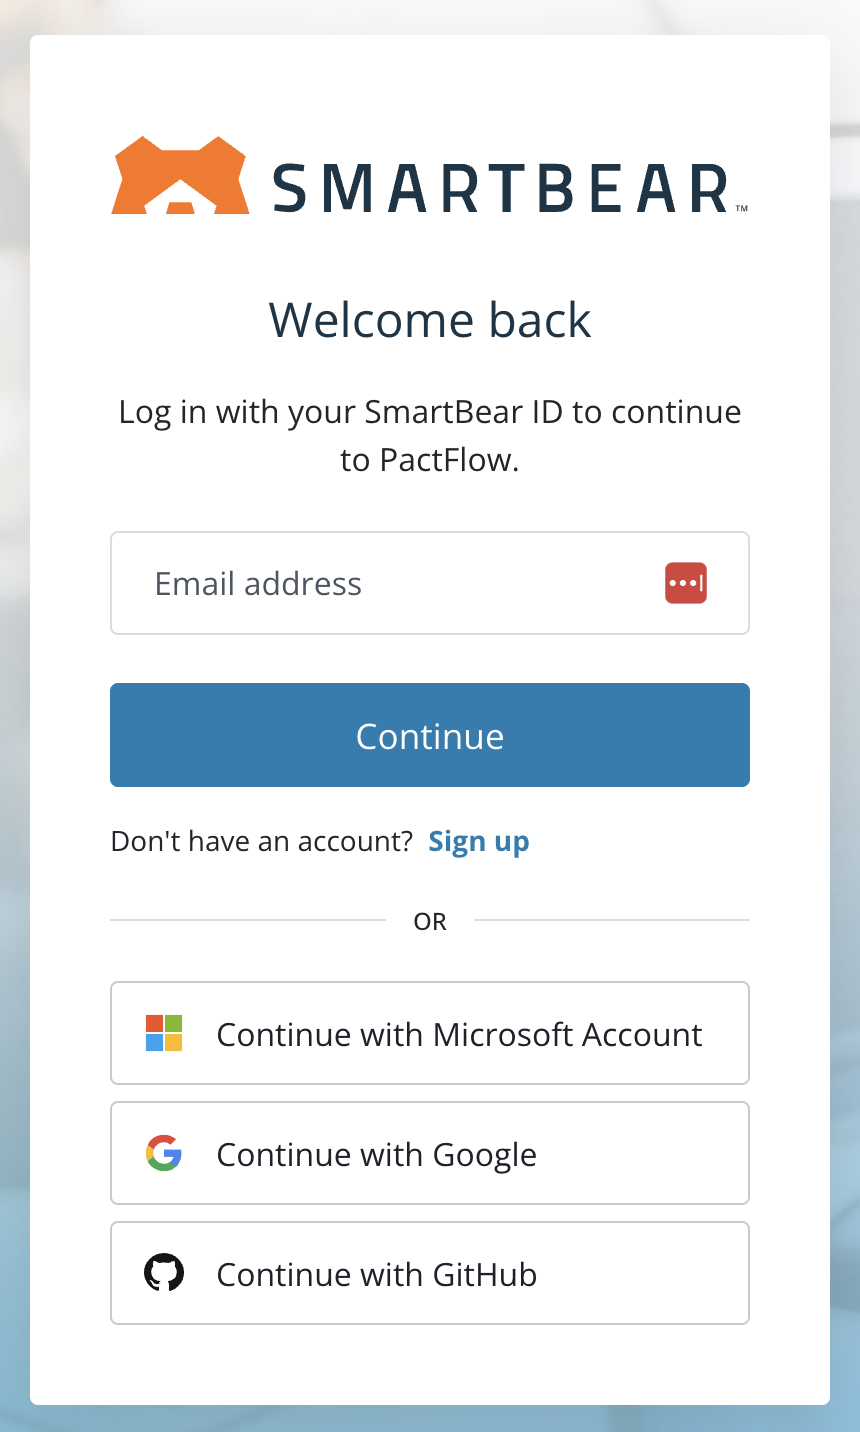 | 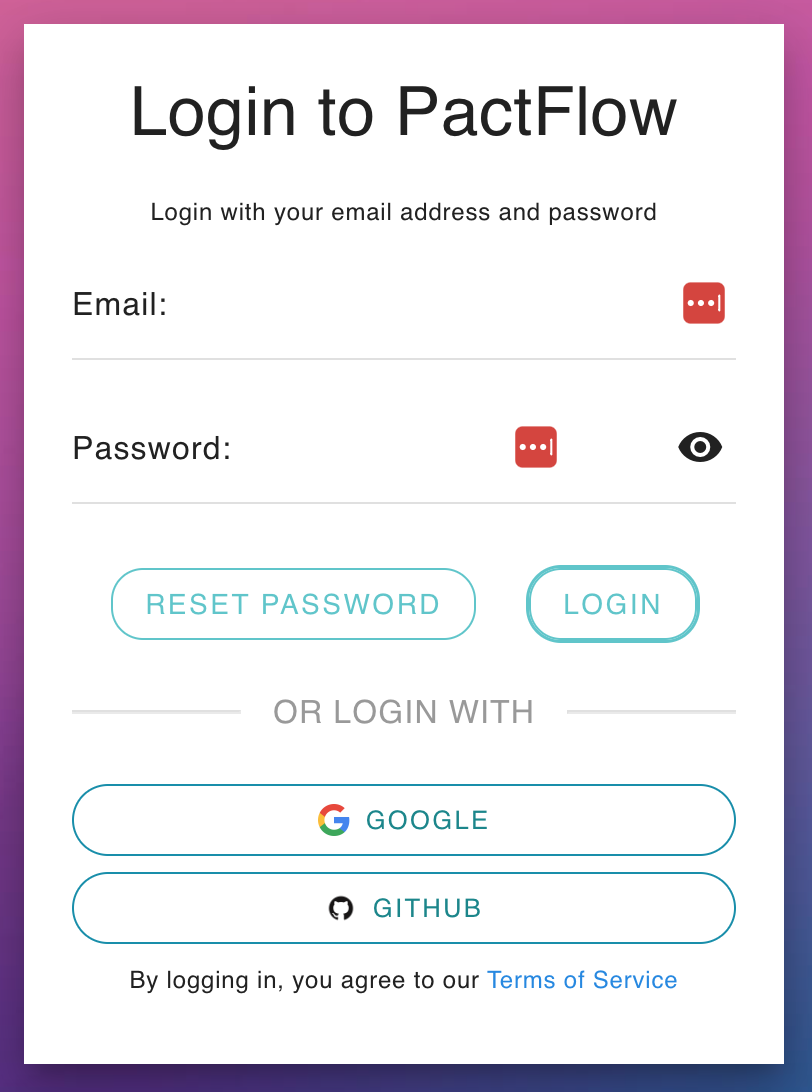 | 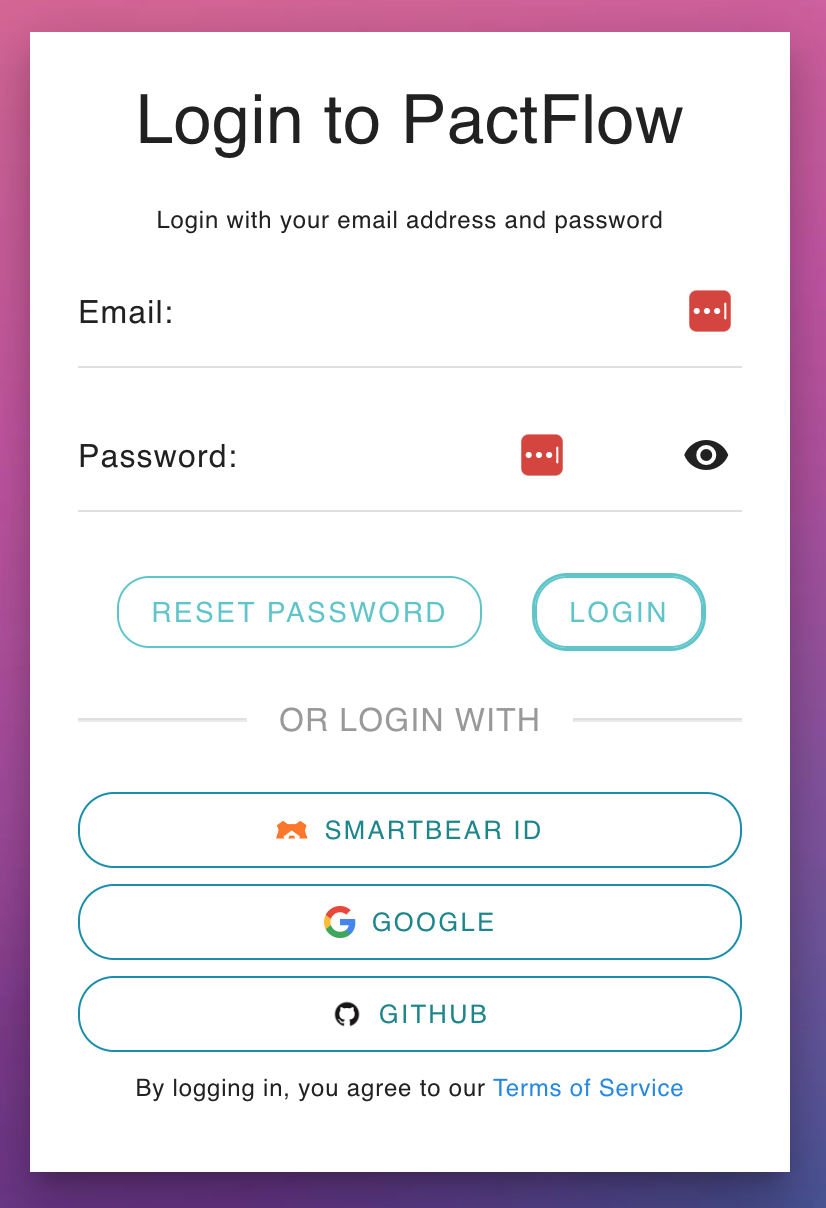 |
| If you only see this page when you visit your PactFlow Account, you are fully transitioned to SmartBear ID. See this guide. | If you see a login page like this, you are on our Cognito authentication. | If there is a "SMARTBEAR ID" button on your login screen like this, you have both enabled and are in the process of migrating to SmartBear ID. |
To make it simpler to access PactFlow, we've rolled out Single Sign-On (SSO) authentication with Github, Google, and SAML2.0.
How it works
SSO users are automatically provisioned when they first authenticate.
NOTE: Changing these settings may require users to do a hard refresh in their browser (CTRL-F5 on Windows and Linux, CMD-R on Mac OSX) before the next time they try to login, or clear their browser cookies and cache.
Prerequisites
If you are migrating to Single Sign-On from username/password based authentication, you should consider enabling the merging of identities based on an email address, via the "Consolidate User Logins by Email" system preference, otherwise, you will end up with duplicate users.
GitHub Authentication
Eligible plans: all
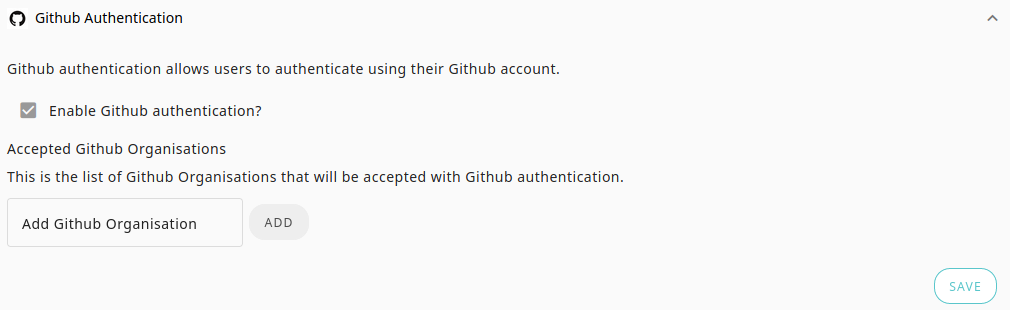
For GitHub authentication, you need to configure the GitHub organisations that you want users who belong to be able to log into your broker instance.
Steps to configure
- Navigate to the Authentication settings page and add the name of the Github organization(s) that should be granted access (hint: given this project URL the name should be
pactflow: github.com/pactflow/example-project). Make sure you get the case right, as the name will need to match exactly. - Press the Save button.
- After configuring Github, you will need to log out.
- Once logged out navigate back to your login screen. You should now have a Github option.
- Login with the new Github option.
- On the first authentication attempt, it will require Github authorization. Follow the in-app prompts to guide you.
Troubleshooting
Seeing the error "None of your GitHub organizations have been registered with PactFlow." when trying to log in
There are multiple reasons why this error may be shown.
You may not have clicked "Grant" or "Request" for that organization on the GitHub PactFlow Authorize screen
To fix this, log out of PactFlow, and go to https://github.com/settings/applications. Revoke PactFlow access, then log in again. You will get an opportunity to grant or request access to your organization again during the login flow.
If you clicked "Request", you may need to ask an administrator to approve the authorization
To fix this, please contact your organization's GitHub administrator, and ask that they follow these instructions to approve PactFlow https://help.github.com/en/articles/approving-oauth-apps-for-your-organization
You may have previously authenticated to PactFlow with GitHub but joined the organization since doing so
To fix this, log out of PactFlow and go to https://github.com/settings/applications. Revoke PactFlow access, then log in again. You will get an opportunity to grant or request access to your organization again during the login flow.
You are not a member of any organizations
Please read https://help.github.com/en/articles/creating-a-new-organization-from-scratch for instructions on creating a GitHub organization.
The name is not populated after signing in
- Ensure that you have given the PactFlow application permission to read personal information. To check this:
- Open https://github.com/settings/applications in a browser.
- Click on the
PactFlowapplication shown in the list. - Under the
Permissionssection, you should see a tick next toRead all user profile data.
- If you have already given this permission, and you still see no name populated in PactFlow, check that you have set a name in your public profile.
- Go to
https://github.com/{your-github-username}in a browser. - Click the
Edit profilebutton shown underneath your avatar on the left of the page. - Enter a value in the
Namefield. - Open a new browser window that has no cookies shared from your previous PactFlow login (clear all your cookies or use an incognito window) and log in to PactFlow again. It should take you through the GitHub login screens - if not, then it's re-using your previous session details, and you need to clear your cookies and try again.
- Once you have successfully logged in to PactFlow again, you should see your name populated in PactFlow.
- Go to
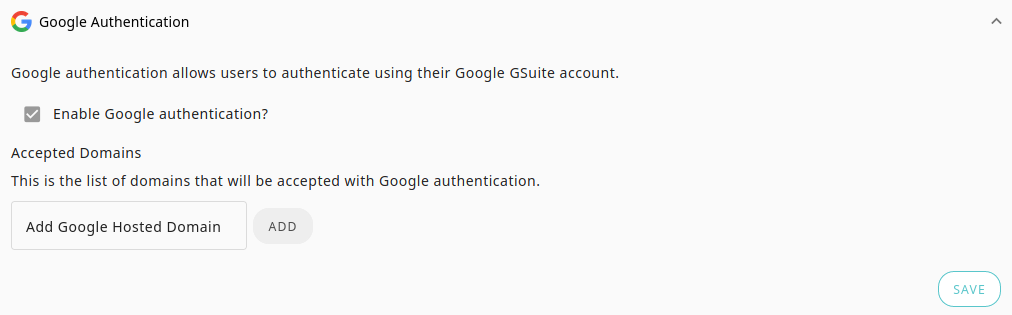
Google Authentication
Eligible plans: all
For Google authentication, you must configure one or more hosted domains for the users that will log into your PactFlow account. On your next login, you will see an option to login with Google has been added. Any users who have a valid identity for the hosted domain can login to your PactFlow instance.
For example, if you use Google Workspace as your choice of email provider and your email is matt@pactflow.io, the hosted domain might be pactflow.io.
You can also use any valid Google or Gmail email address, such as matt@gmail.com or matt@pactflow.io. This limits the authentication to a single user.
SAML Support
Eligible plans: Enterprise
PactFlow supports SAML 2.0 integration with a compatible Identity Provider (IdP) such as Okta, Ping, Auth0, Azure AD, OneLogin, etc.
SAML2.0 allows you to externalise the authentication and access to your PactFlow account. Authorization and fine-grained permissions are managed within your account by an account Administrator.
Supported capabilities:
- Authorization from an external IdP
- SP initiated login
- SCIM
We do not currently support the following:
- Automated user provisioning into your account (Users must first be invited)
- Automated user deprovisioning (users will appear "active" and count toward user limits, although will not be able to login if disabled in the IdP)
- IdP initiated login
- Service Provider (SP) initiated logout flow
Setup
1. Configure PactFlow as a Service Provider in your IdP
In your IdP, create a new Service Provider with the following properties:
- Audience URI (SP Entity ID):
urn:amazon:cognito:sp:ap-southeast-2_x0L1olP0D - Single sign-on URL (Reply URL):
https://pact-saas-prod-1.auth.ap-southeast-2.amazoncognito.com/saml2/idpresponse - Name ID format must be set to "Persistent":
urn:oasis:names:tc:SAML:2.0:nameid-format:persistent
2. Map the required SAML2.0 attributes
The following attributes are required by PactFlow and must be mapped in your IdP to be sent through during the authentication flow:
| Property to map from your IDP | Attribute Name in SAML Assertion | Name Format |
|---|---|---|
| First Name | http://schemas.xmlsoap.org/ws/2005/05/identity/claims/givenname | URI Reference |
| Last Name | http://schemas.xmlsoap.org/ws/2005/05/identity/claims/surname | URI Reference |
| Email Address | http://schemas.xmlsoap.org/ws/2005/05/identity/claims/emailaddress | URI Reference |
For example, a valid Attribute in the SAML assertion for a user's first name would look like this:
<Attribute Name="http://schemas.xmlsoap.org/ws/2005/05/identity/claims/givenname" NameFormat="urn:oasis:names:tc:SAML:2.0:attrname-format:uri">
  <AttributeValue xmlns:xsi="http://www.w3.org/2001/XMLSchema-instance" xsi:type="xs:string">Joe</AttributeValue>
</Attribute>
3. Export IdP metadata
Once you have configured PactFlow as a Service Provider, please send your PactFlow account details and an externally accessible URL to the metadata file via our support form. If it is impossible to provide a URL, you may export the metadata as an XML file. It is preferable to use a URL, as this will allow you to make any updates without contacting PactFlow support.
Examples
The following can be used to compare against your own IdP setup to check if you're missing anything. Note these were both produced via Okta.
Example of valid metadata document
<?xml version="1.0" encoding="UTF-8"?>
<md:EntityDescriptor xmlns:md="urn:oasis:names:tc:SAML:2.0:metadata" entityID="http://www.okta.com/exkpvtn73rd6mMmF34x6">
   <md:IDPSSODescriptor WantAuthnRequestsSigned="false" protocolSupportEnumeration="urn:oasis:names:tc:SAML:2.0:protocol">
      <md:KeyDescriptor use="signing">
         <ds:KeyInfo xmlns:ds="http://www.w3.org/2000/09/xmldsig#">
            <ds:X509Data>
               <ds:X509Certificate>MIIDpDCCAoygAwIBAgIGAXPl6shZMA0GCSqGSIb3DQEBCwUAMIGSMQswCQYDVQQGEwJVUzETMBEG
A1UECAwKQ2FsaWZvcm5pYTEWMBQGA1UEBwwNU2FuIEZyYW5jaXNjbzENMAsGA1UECgwET2t0YTEU
MBIGA1UECwwLU1NPUHJvdmlkZXIxEzARBgNVBAMMCmRldi04OTA1NTYxHDAaBgkqhkiG9w0BCQEW
DWluZm9Ab2t0YS5jb20wHhcNMjAwODEzMDM0MjU1WhcNMzAwODEzMDM0MzU1WjCBkjELMAkGA1UE
BhMCVVMxEzARBgNVBAgMCkNhbGlmb3JuaWExFjAUBgNVBAcMDVNhbiBGcmFuY2lzY28xDTALBgNV
BAoMBE9rdGExFDASBgNVBAsMC1NTT1Byb3ZpZGVyMRMwEQYDVQQDDApkZXYtODkwNTU2MRwwGgYJ
KoZIhvcNAQkBFg1pbmZvQG9rdGEuY29tMIIBIjANBgkqhkiG9w0BAQEFAAOCAQ8AMIIBCgKCAQEA
mgdKOOa+KPUYuCXNl6ab/1AgaRIzxjvXxyEjAceLig4ljsgRVawo5F8CG2JMa2anejfJdHsu/sNo
SORi59V9MSYso8mH2krRNKkAiMWwXO6ncvHxwWJsZqPnuDMPhU+vhCbxAg9zSKgnuhW/Li/qs16x
IDjmJFUXMSksbC9wEmrHw1hR8Zl94L0lwcTLwVeQtTZ3pfpDN4HT84wA/lc1sn/heXyikv1fgP1E
onpbsQXuFjw9vQT7UekAjeYi0cVTX0wVZ3WKob62v5zJZhFkVrdDbJ7Zsg9sGwXom3RpKcLEw/vo
PcSc69ARiCkHY4fhOSykkFottLh/xsTp0Pw3UQIDAQABMA0GCSqGSIb3DQEBCwUAA4IBAQAEoVfX
8yda3v4s/28nPpy0g+m1oXduagcYKFjCWg7Wou7G47Li8k2Xcm1Ck+gMvDn10dzHq2+RBKwBs59d
msqk2Pq8pI9C5Cp2f7Ad+or3XhpWa4IKQjVvGt1vV2WCasEPHwL+1a9Alhg47x/GmoYoMRHaT7fG
+a3ZYe+QF5cIGFyWj5QxUkKcD/FE37N2DQuPQOzOHDYe9BQCi/FFC2GarpiGIgPQd9RDjsTDpFKC
t9lzfbF/65I6ISDB5TQyCaLvSf8cofivLe3EQpw0sZ97fLi7VOlOY888elByNALcl5rf7qLuh/gP
Oiv9B1SsJ0l/zk0FxwLCCKFGXn1RSV8/</ds:X509Certificate>
            </ds:X509Data>
         </ds:KeyInfo>
      </md:KeyDescriptor>
      <md:NameIDFormat>urn:oasis:names:tc:SAML:1.1:nameid-format:emailAddress</md:NameIDFormat>
      <md:NameIDFormat>urn:oasis:names:tc:SAML:2.0:nameid-format:persistent</md:NameIDFormat>
      <md:SingleSignOnService Binding="urn:oasis:names:tc:SAML:2.0:bindings:HTTP-POST" Location="https://dev-890556.okta.com/app/pactflowdev890556_pactflow_1/exkpvtn73rd6mMmF34x6/sso/saml" />
      <md:SingleSignOnService Binding="urn:oasis:names:tc:SAML:2.0:bindings:HTTP-Redirect" Location="https://dev-890556.okta.com/app/pactflowdev890556_pactflow_1/exkpvtn73rd6mMmF34x6/sso/saml" />
   </md:IDPSSODescriptor>
</md:EntityDescriptor>
This is the assertion sent to the PactFlow Reply URL
<?xml version="1.0" encoding="UTF-8"?>
<saml2p:Response xmlns:saml2p="urn:oasis:names:tc:SAML:2.0:protocol" xmlns:xs="http://www.w3.org/2001/XMLSchema" Destination="https://pact-saas-prod-1.auth.ap-southeast-2.amazoncognito.com/saml2/idpresponse" ID="id3718331499099330736053153" InResponseTo="_125f72fb-e3bf-40d0-ba42-77152c2c0845" IssueInstant="2020-08-19T03:26:29.364Z" Version="2.0">
  <saml2:Issuer xmlns:saml2="urn:oasis:names:tc:SAML:2.0:assertion" Format="urn:oasis:names:tc:SAML:2.0:nameid-format:entity">http://www.okta.com/exkpvtn73rd6mMmF34x6</saml2:Issuer>
  <ds:Signature xmlns:ds="http://www.w3.org/2000/09/xmldsig#">
    <ds:SignedInfo>
      <ds:CanonicalizationMethod Algorithm="http://www.w3.org/2001/10/xml-exc-c14n#" />
      <ds:SignatureMethod Algorithm="http://www.w3.org/2001/04/xmldsig-more#rsa-sha256" />
      <ds:Reference URI="#id3718331499099330736053153">
        <ds:Transforms>
          <ds:Transform Algorithm="http://www.w3.org/2000/09/xmldsig#enveloped-signature" />
          <ds:Transform Algorithm="http://www.w3.org/2001/10/xml-exc-c14n#">
            <ec:InclusiveNamespaces xmlns:ec="http://www.w3.org/2001/10/xml-exc-c14n#" PrefixList="xs" />
          </ds:Transform>
        </ds:Transforms>
        <ds:DigestMethod Algorithm="http://www.w3.org/2001/04/xmlenc#sha256" />
        <ds:DigestValue>uJgujmj ... 26En8=</ds:DigestValue>
      </ds:Reference>
    </ds:SignedInfo>
    <ds:SignatureValue>S/xuVKLEfmIj2I0+Vjvr ... 29vtaSKQkHeQMwCpSUfKIIoZ/OlnDQ==</ds:SignatureValue>
    <ds:KeyInfo>
      <ds:X509Data>
        <ds:X509Certificate>MIIDpDCCAoygAwIBAgIGAXPl6shZMA0GCSqGSIb3DQEBCwUAMIGSMQswCQYDVQQGEwJVUzETMBEG A1UECAwKQ2FsaWZvcm5pYTEWMBQGA1UEBwwNU2FuIEZyYW5jaXNjbzENMAsGA1UECgwET2t0YTEU MBIGA1UECwwLU1NPUHJvdmlkZXIxEzARBgNVBAMMCmRldi04OTA1NTYxHDAaBgkqhkiG9w0BCQEW DWluZm9Ab2t0YS5jb20wHhcNMjAwODEzMDM0MjU1WhcNMzAwODEzMDM0MzU1WjCBkjELMAkGA1UEBhMCVVMxEzARBgNVBAgMCkNhbGlmb3JuaWExFjAUBgNVBAcMDVNhbiBGcmFuY2lzY28xDTALBgNVBAoMBE9rdGExFDASBgNVBAsMC1NTT1Byb3ZpZGVyMRMwEQYDVQQDDApkZXYtODkwNTU2MRwwGgYJ KoZIhvcNAQkBFg1pbmZvQG9rdGEuY29tMIIBIjANBgkqhkiG9w0BAQEFAAOCAQ8AMIIBCgKCAQEAmgdKOOa+KPUYuCXNl6ab/1AgaRIzxjvXxyEjAceLig4ljsgRVawo5F8CG2JMa2anejfJdHsu/sNoSORi59V9MSYso8mH2krRNKkAiMWwXO6ncvHxwWJsZqPnuDMPhU+vhCbxAg9zSKgnuhW/Li/qs16x IDjmJFUXMSksbC9wEmrHw1hR8Zl94L0lwcTLwVeQtTZ3pfpDN4HT84wA/lc1sn/heXyikv1fgP1EonpbsQXuFjw9vQT7UekAjeYi0cVTX0wVZ3WKob62v5zJZhFkVrdDbJ7Zsg9sGwXom3RpKcLEw/voPcSc69ARiCkHY4fhOSykkFottLh/xsTp0Pw3UQIDAQABMA0GCSqGSIb3DQEBCwUAA4IBAQAEoVfX 8yda3v4s/28nPpy0g+m1oXduagcYKFjCWg7Wou7G47Li8k2Xcm1Ck+gMvDn10dzHq2+RBKwBs59dmsqk2Pq8pI9C5Cp2f7Ad+or3XhpWa4IKQjVvGt1vV2WCasEPHwL+1a9Alhg47x/GmoYoMRHaT7fG+a3ZYe+QF5cIGFyWj5QxUkKcD/FE37N2DQuPQOzOHDYe9BQCi/FFC2GarpiGIgPQd9RDjsTDpFKt9lzfbF/65I6ISDB5TQyCaLvSf8cofivLe3EQpw0sZ97fLi7VOlOY888elByNALcl5rf7qLuh/gPOiv9B1SsJ0l/zk0FxwLCCKFGXn1RSV8/</ds:X509Certificate>
      </ds:X509Data>
    </ds:KeyInfo>
  </ds:Signature>
  <saml2p:Status>
    <saml2p:StatusCode Value="urn:oasis:names:tc:SAML:2.0:status:Success" />
  </saml2p:Status>
  <saml2:Assertion xmlns:saml2="urn:oasis:names:tc:SAML:2.0:assertion" ID="id37183314991817892005295917" IssueInstant="2020-08-19T03:26:29.364Z" Version="2.0">
    <saml2:Issuer Format="urn:oasis:names:tc:SAML:2.0:nameid-format:entity">http://www.okta.com/exkpvtn73rd6mMmF34x6</saml2:Issuer>
    <ds:Signature xmlns:ds="http://www.w3.org/2000/09/xmldsig#">
      <ds:SignedInfo>
        <ds:CanonicalizationMethod Algorithm="http://www.w3.org/2001/10/xml-exc-c14n#" />
        <ds:SignatureMethod Algorithm="http://www.w3.org/2001/04/xmldsig-more#rsa-sha256" />
        <ds:Reference URI="#id37183314991817892005295917">
          <ds:Transforms>
            <ds:Transform Algorithm="http://www.w3.org/2000/09/xmldsig#enveloped-signature" />
            <ds:Transform Algorithm="http://www.w3.org/2001/10/xml-exc-c14n#">
              <ec:InclusiveNamespaces xmlns:ec="http://www.w3.org/2001/10/xml-exc-c14n#" PrefixList="xs" />
            </ds:Transform>
          </ds:Transforms>
          <ds:DigestMethod Algorithm="http://www.w3.org/2001/04/xmlenc#sha256" />
          <ds:DigestValue>UTRr45 ... 7drNjg2E=</ds:DigestValue>
        </ds:Reference>
      </ds:SignedInfo>
      <ds:SignatureValue>a7SSAhT+xjgmwq0d+y6 ... 3Wzt+9g3sIeOuz30MuDn+kUjqs1w==</ds:SignatureValue>
      <ds:KeyInfo>
        <ds:X509Data>
          <ds:X509Certificate>MIIDpDCCAoygAwIBAgIGAXPl6shZMA0GCSqGSIb3DQEBCwUAMIGSMQswCQYDVQQGEwJVUzETMBEG A1UECAwKQ2FsaWZvcm5pYTEWMBQGA1UEBwwNU2FuIEZyYW5jaXNjbzENMAsGA1UECgwET2t0YTEU MBIGA1UECwwLU1NPUHJvdmlkZXIxEzARBgNVBAMMCmRldi04OTA1NTYxHDAaBgkqhkiG9w0BCQEW DWluZm9Ab2t0YS5jb20wHhcNMjAwODEzMDM0MjU1WhcNMzAwODEzMDM0MzU1WjCBkjELMAkGA1UEBhMCVVMxEzARBgNVBAgMCkNhbGlmb3JuaWExFjAUBgNVBAcMDVNhbiBGcmFuY2lzY28xDTALBgNVBAoMBE9rdGExFDASBgNVBAsMC1NTT1Byb3ZpZGVyMRMwEQYDVQQDDApkZXYtODkwNTU2MRwwGgYJ KoZIhvcNAQkBFg1pbmZvQG9rdGEuY29tMIIBIjANBgkqhkiG9w0BAQEFAAOCAQ8AMIIBCgKCAQEAmgdKOOa+KPUYuCXNl6ab/1AgaRIzxjvXxyEjAceLig4ljsgRVawo5F8CG2JMa2anejfJdHsu/sNoSORi59V9MSYso8mH2krRNKkAiMWwXO6ncvHxwWJsZqPnuDMPhU+vhCbxAg9zSKgnuhW/Li/qs16x IDjmJFUXMSksbC9wEmrHw1hR8Zl94L0lwcTLwVeQtTZ3pfpDN4HT84wA/lc1sn/heXyikv1fgP1EonpbsQXuFjw9vQT7UekAjeYi0cVTX0wVZ3WKob62v5zJZhFkVrdDbJ7Zsg9sGwXom3RpKcLEw/voPcSc69ARiCkHY4fhOSykkFottLh/xsTp0Pw3UQIDAQABMA0GCSqGSIb3DQEBCwUAA4IBAQAEoVfX8yda3v4s/28nPpy0g+m1oXduagcYKFjCWg7Wou7G47Li8k2Xcm1Ck+gMvDn10dzHq2+RBKwBs59d msqk2Pq8pI9C5Cp2f7Ad+or3XhpWa4IKQjVvGt1vV2WCasEPHwL+1a9Alhg47x/GmoYoMRHaT7fG+a3ZYe+QF5cIGFyWj5QxUkKcD/FE37N2DQuPQOzOHDYe9BQCi/FFC2GarpiGIgPQd9RDjsTDpFKCt9lzfbF/65I6ISDB5TQyCaLvSf8cofivLe3EQpw0sZ97fLi7VOlOY888elByNALcl5rf7qLuh/gPOiv9B1SsJ0l/zk0FxwLCCKFGXn1RSV8/</ds:X509Certificate>
        </ds:X509Data>
      </ds:KeyInfo>
    </ds:Signature>
    <saml2:Subject>
      <saml2:NameID Format="urn:oasis:names:tc:SAML:2.0:nameid-format:persistent">joe@bloggs.com</saml2:NameID>
      <saml2:SubjectConfirmation Method="urn:oasis:names:tc:SAML:2.0:cm:bearer">
        <saml2:SubjectConfirmationData InResponseTo="_125f72fb-e3bf-40d0-ba42-77152c2c0845" NotOnOrAfter="2020-08-19T03:31:29.364Z" Recipient="https://pact-saas-prod-1.auth.ap-southeast-2.amazoncognito.com/saml2/idpresponse" />
      </saml2:SubjectConfirmation>
    </saml2:Subject>
    <saml2:Conditions NotBefore="2020-08-19T03:21:29.364Z" NotOnOrAfter="2020-08-19T03:31:29.364Z">
      <saml2:AudienceRestriction>
        <saml2:Audience>urn:amazon:cognito:sp:ap-southeast-2_x0L1olP0D</saml2:Audience>
      </saml2:AudienceRestriction>
    </saml2:Conditions>
    <saml2:AuthnStatement AuthnInstant="2020-08-19T03:26:29.364Z" SessionIndex="_125f72fb-e3bf-40d0-ba42-77152c2c0845">
      <saml2:AuthnContext>
        <saml2:AuthnContextClassRef>urn:oasis:names:tc:SAML:2.0:ac:classes:PasswordProtectedTransport</saml2:AuthnContextClassRef>
      </saml2:AuthnContext>
    </saml2:AuthnStatement>
    <saml2:AttributeStatement>
      <saml2:Attribute Name="http://schemas.xmlsoap.org/ws/2005/05/identity/claims/givenname" NameFormat="urn:oasis:names:tc:SAML:2.0:attrname-format:uri">
        <saml2:AttributeValue xmlns:xsi="http://www.w3.org/2001/XMLSchema-instance" xsi:type="xs:string">Joe</saml2:AttributeValue>
      </saml2:Attribute>
      <saml2:Attribute Name="http://schemas.xmlsoap.org/ws/2005/05/identity/claims/surname" NameFormat="urn:oasis:names:tc:SAML:2.0:attrname-format:uri">
        <saml2:AttributeValue xmlns:xsi="http://www.w3.org/2001/XMLSchema-instance" xsi:type="xs:string">Bloggs</saml2:AttributeValue>
      </saml2:Attribute>
      <saml2:Attribute Name="http://schemas.xmlsoap.org/ws/2005/05/identity/claims/emailaddress" NameFormat="urn:oasis:names:tc:SAML:2.0:attrname-format:uri">
        <saml2:AttributeValue xmlns:xsi="http://www.w3.org/2001/XMLSchema-instance" xsi:type="xs:string">joe@bloggs.com</saml2:AttributeValue>
      </saml2:Attribute>
    </saml2:AttributeStatement>
  </saml2:Assertion>
</saml2p:Response>
Okta
See https://developer.okta.com/docs/guides/build-sso-integration/saml2/overview/ for further details on any of the steps below.
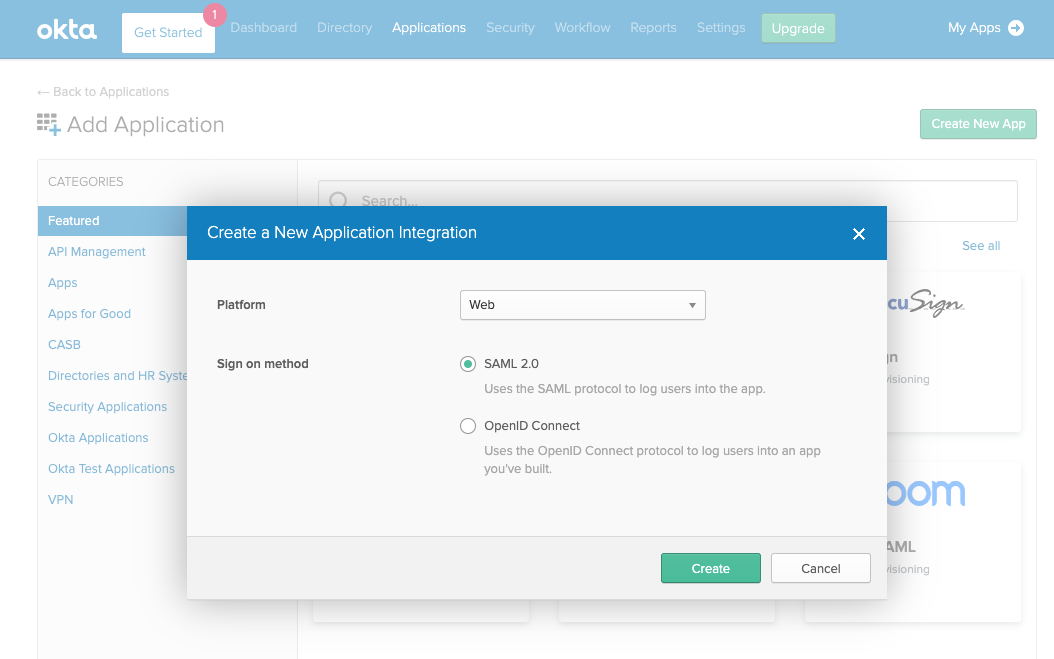
1. Create a SAML app in Okta
- Open the Okta Developer Console.
- Choose Applications, and then choose Add Application.
- On the Add Application page, choose Create New App.
- In the Create a New Application Integration dialog, confirm that the Platform is set to Web.
- For the Sign-on method, choose SAML 2.0.
- Choose Create.
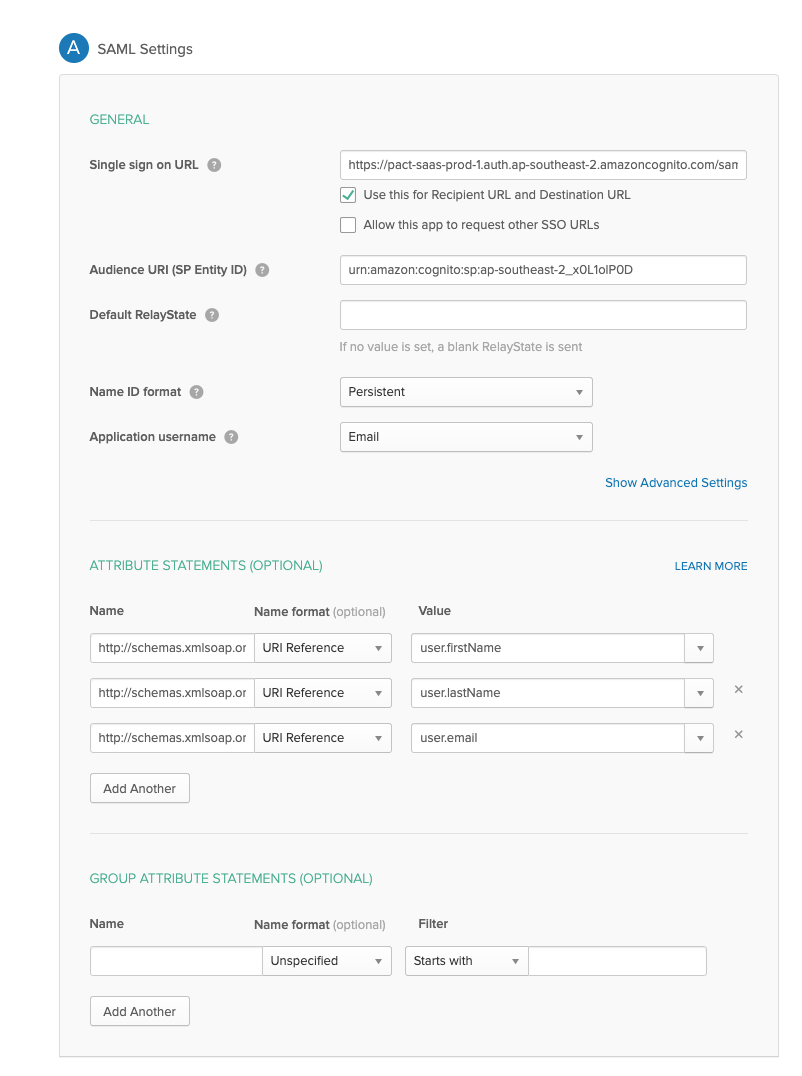
2. Configure SAML integration for your Okta app
- On the Create SAML Integration page, under General Settings, enter a name for your app.
- (Optional) Upload a logo and choose visibility settings for your app.
- Choose Next.
- Under GENERAL, for Single sign-on URL, enter
https://pact-saas-prod-1.auth.ap-southeast-2.amazoncognito.com/saml2/idpresponse. - For Audience URI (SP Entity ID), enter urn:
urn:amazon:cognito:sp:ap-southeast-2_x0L1olP0D - Under ATTRIBUTE STATEMENTS (OPTIONAL), add 3 statements with the following information:
- For Name, enter the SAML attribute name
http://schemas.xmlsoap.org/ws/2005/05/identity/claims/givenname. - For Value, enter
user.firstName. - For Name, enter the SAML attribute name
http://schemas.xmlsoap.org/ws/2005/05/identity/claims/surname. - For Value, enter
user.lastName. - For Name, enter the SAML attribute name
http://schemas.xmlsoap.org/ws/2005/05/identity/claims/emailaddress. - For Value, enter
user.email.
- For Name, enter the SAML attribute name
- Choose Next.
- Choose a feedback response for Okta Support.
- Choose Finish.
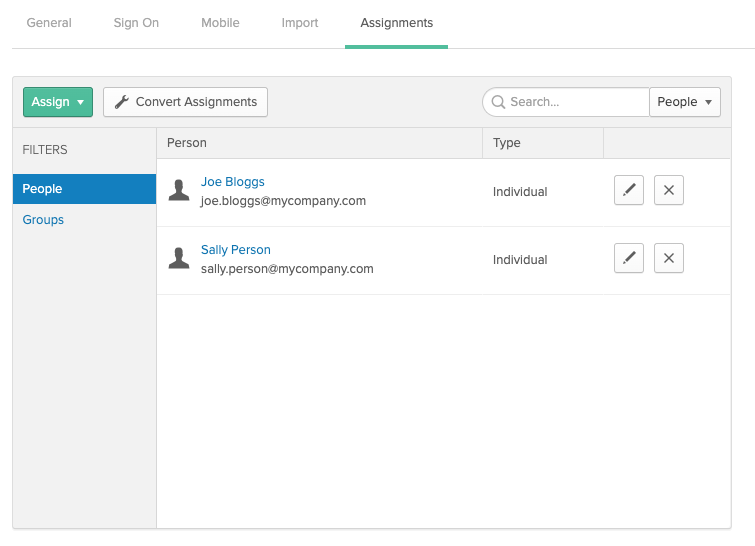
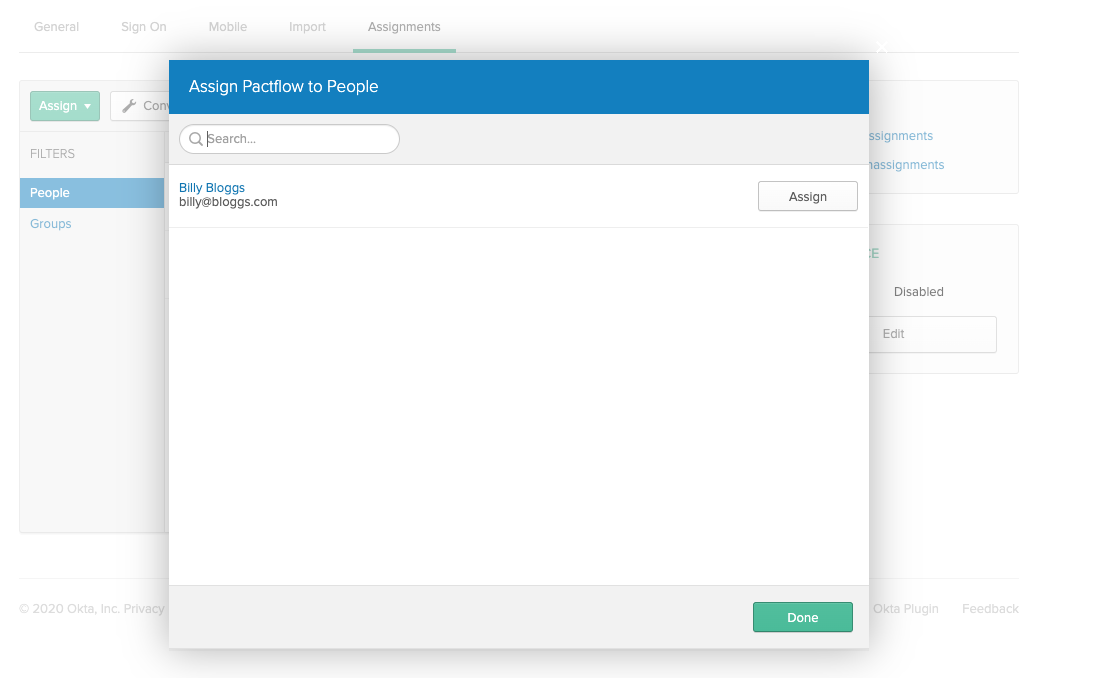
3. Assign a user to your Okta application
- On the Assignments tab for your Okta app, for Assign, choose Assign to People.
- Next to the user you want to assign, choose Assign.
- Note: If this is a new account, the only option is to choose yourself (the admin) as the user.
- Choose Save and Go Back. Your user is assigned.
- Choose Done.
4. Get the IdP metadata for your Okta application
- On the Sign-On tab for your Okta app, find the Identity Provider metadata hyperlink. Right-click the hyperlink and copy the URL.
- For more information, see Configure SAML in your app in the Set up a SAML application in Okta guide on the Okta Developer website.
5. Contact PactFlow to enable your IdP
Send your unique metadata URL to us here.
Azure Active Directory
See https://docs.microsoft.com/en-us/azure/active-directory/manage-apps/configure-federated-single-sign-on-non-gallery-applications for more information.
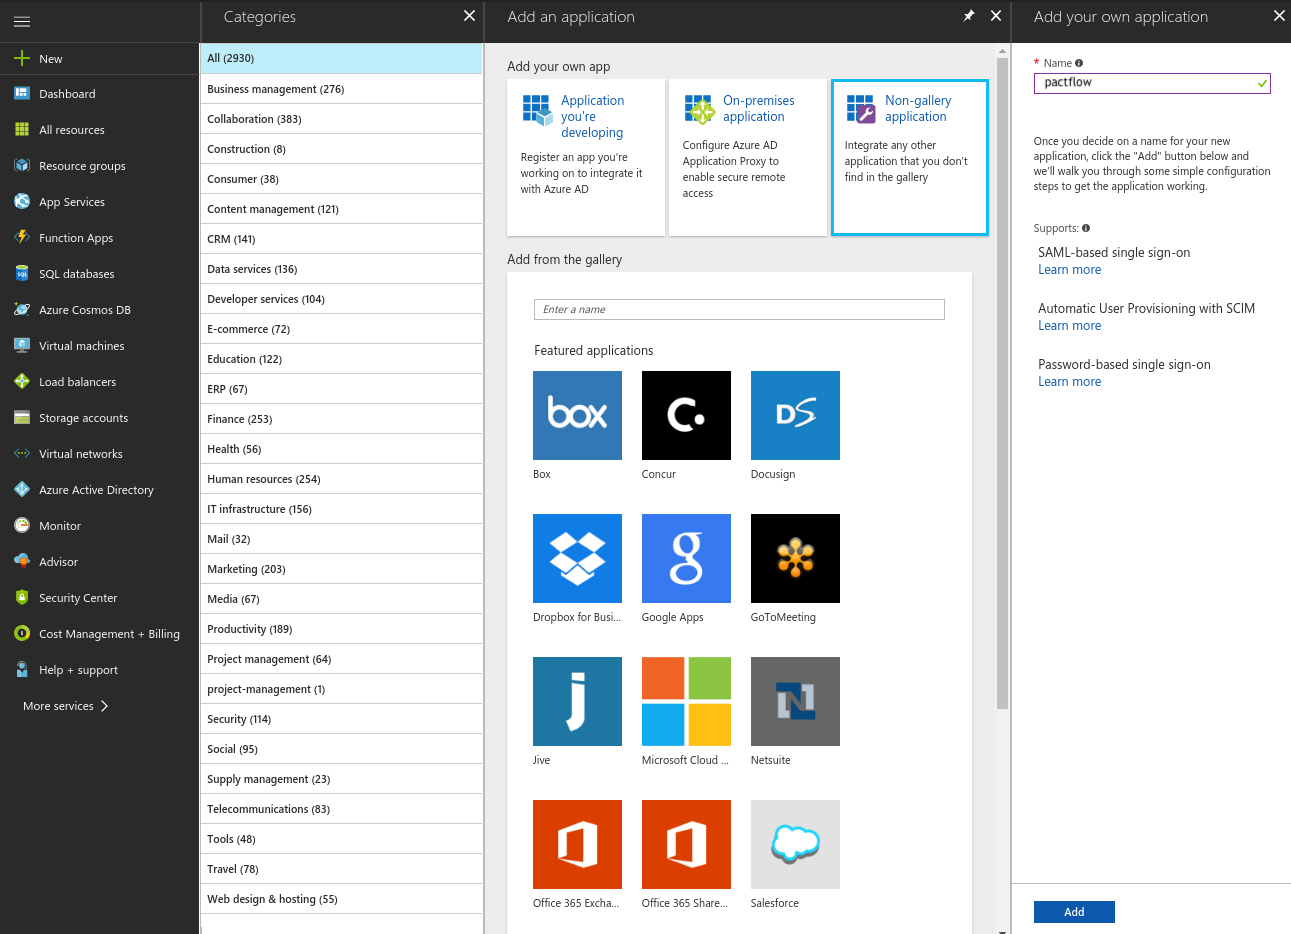
- Create a non-gallery application
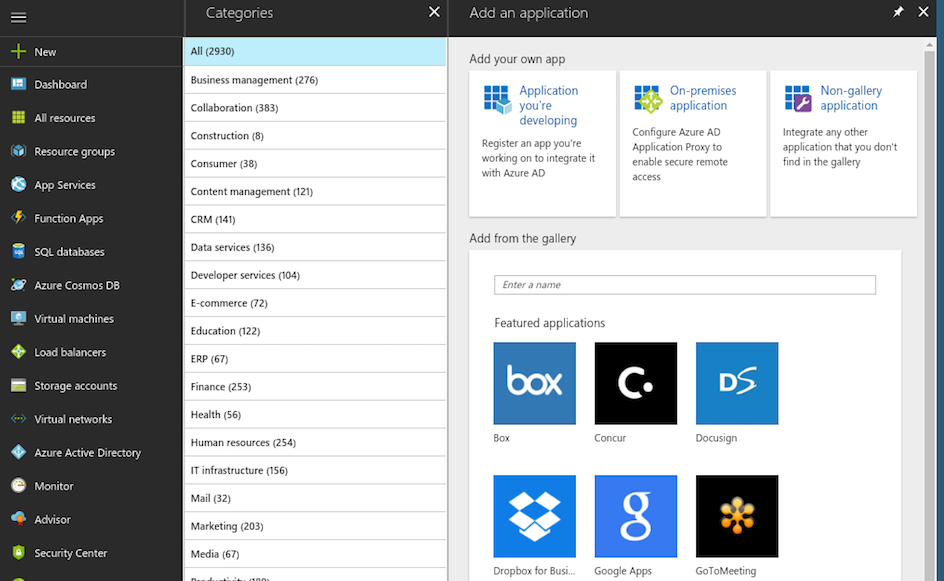
- Follow the Microsoft documentation for creating a non-gallery application.
- Choose
Non-gallery applicationat theAdd your own appscreen. - Set the name to
pactflowwhen prompted.
- When the application has been created, assign the users that should be allowed to login to PactFlow.
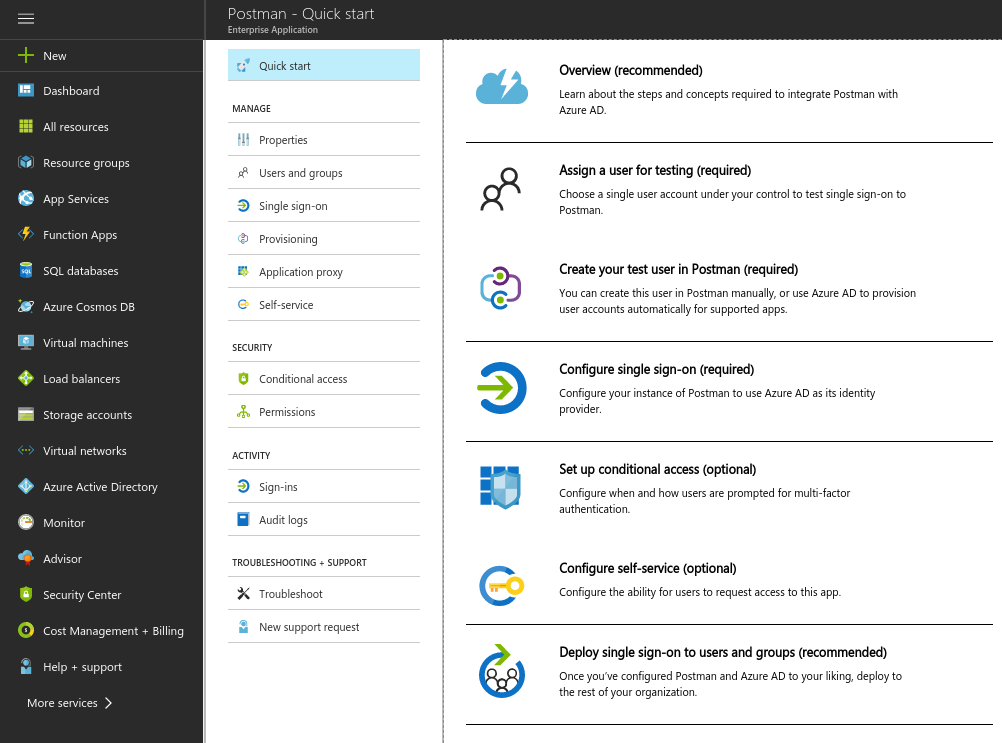
- Once the users have been assigned, select the
Single sign-ontab. SelectSAML.
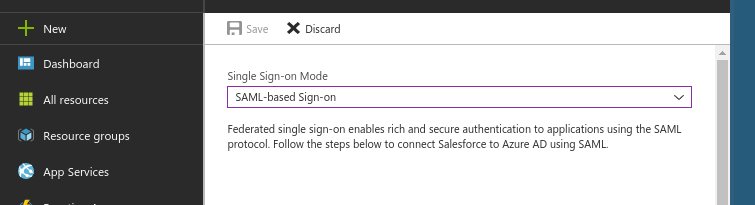
- Proceed to the next step.
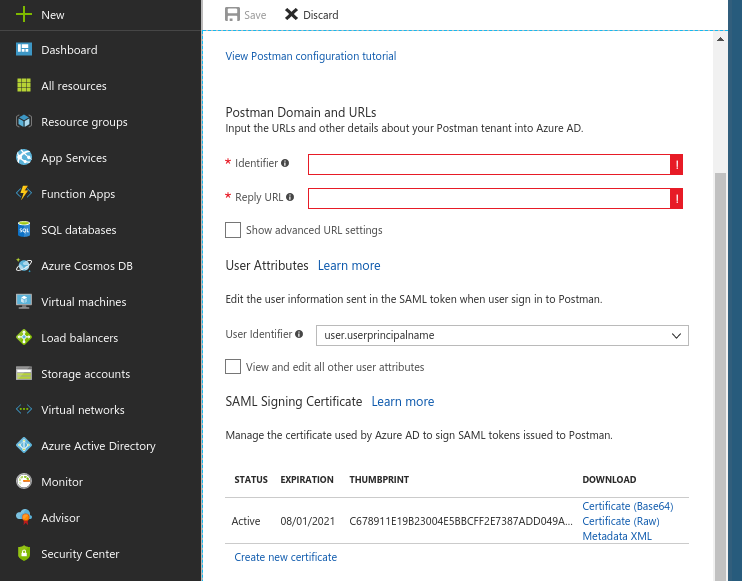
Set the Identifier (Entity ID) to
urn:amazon:cognito:sp:ap-southeast-2_x0L1olP0DSet the Reply URL to
https://pact-saas-prod-1.auth.ap-southeast-2.amazoncognito.com/saml2/idpresponseRelay State and Logout URL fields are blank.
Set the Sign-On URL to point to your unique PactFlow URL (e.g. https://companyaccount.pactflow.io) (this is required as we don't support IDP initiated sign-on)
To add user attributes, click "View and edit all other user attributes" to edit the attributes to be sent to the application in the SAML token when users sign in. Add the following 3 attributes:
- First Name:
http://schemas.xmlsoap.org/ws/2005/05/identity/claims/givenname. - Last Name:
http://schemas.xmlsoap.org/ws/2005/05/identity/claims/surname. - Email Address:
http://schemas.xmlsoap.org/ws/2005/05/identity/claims/emailaddress.
- First Name:
OneLogin - via PactFlow Connector
- On the OneLogin portal page, choose Administration.
- From the Administration page, choose Applications, and then choose Add App.
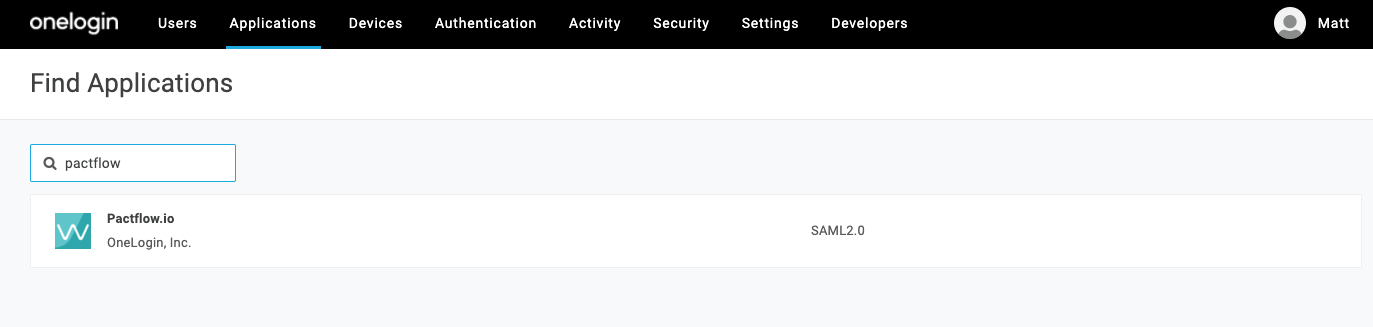
- In the search bar under Find Applications, enter "pactflow", and then choose the PactFlow Connector
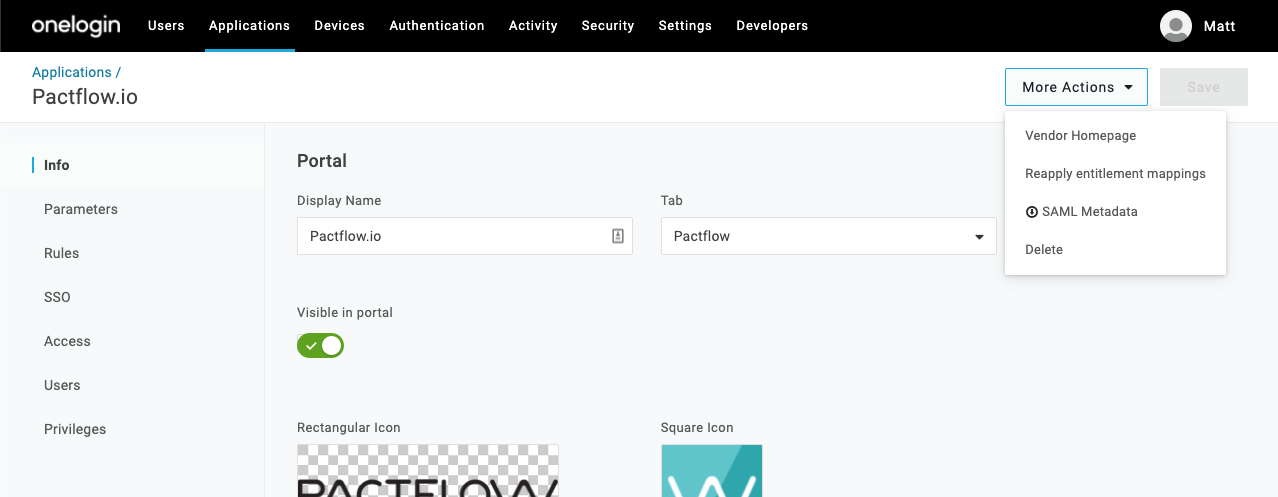
- (Optional) Do any of the following: For Display Name, enter a name and description. For example, PactFlow. For the Rectangular Icon and Square Icon, you can add PactFlow icons. For Description, enter a summary.
- Choose Save.
- On the homepage of the new application, choose "More Actions > SAML Metadata" from the main menu
OneLogin - manual setup
1. Create a OneLogin application
- On the OneLogin portal page, choose Administration.
- From the Administration page, choose Applications, and then choose Add App.
- In the search bar under Find Applications, enter saml, and then choose SAML Test Connector (Advanced) to open the Add SAML Test Connector page.
- (Optional) Do any of the following: For Display Name, enter a name and description. For example, PactFlow. For the Rectangular Icon and Square Icon, you can add PactFlow icons. For Description, enter a summary.
- Choose Save.
2. Edit your OneLogin application configuration
- Choose Configuration.
- On the Configuration page, do the following:
For RelayState, leave it blank.
For Audience, enter
urn:amazon:cognito:sp:ap-southeast-2_x0L1olP0DLeave Recipient blank. For ACS (Consumer) URL Validator, enterhttps://pact-saas-prod-1.auth.ap-southeast-2.amazoncognito.com/saml2/idpresponseFor ACS (Consumer) URL, enterhttps://pact-saas-prod-1.auth.ap-southeast-2.amazoncognito.com/saml2/idpresponseLeave Single Logout URL blank.
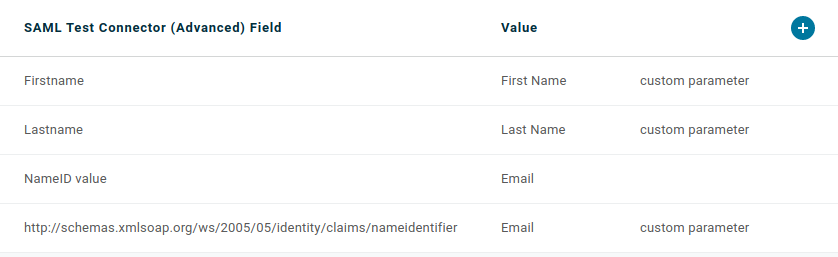
3. Edit your OneLogin application's parameters
- Choose Parameters. Note: One parameter (NameID (fka Email)) is already listed—this is expected.
- Choose Add parameter to create a new, custom parameter.
- In the New Field dialog, for Field name, enter
http://schemas.xmlsoap.org/ws/2005/05/identity/claims/nameidentifier - For Flags, select the Include in SAML assertion check box.
- Choose Save.
- For Value, choose Email from the list.
- Choose Save.
You then need to repeat the steps for the first name and last name.
- Choose Add parameter to create a new, custom parameter.
- In the New Field dialog, for Field name, enter First Name
- For Flags, select the Include in SAML assertion check box.
- Choose Save.
- For Value, choose First Name from the list.
- Choose Save.
- Choose Add parameter to create a new, custom parameter.
- In the New Field dialog, for Field name, enter Lastname
- For Flags, select the Include in SAML assertion check box.
- Choose Save.
- For Value, choose First Name from the list.
- Choose Save.
You should define the following attributes:
4. Copy the IdP metadata for your OneLogin application
- Choose SSO.
- Under Issuer URL, copy the URL to your clipboard. You need to provide this URL to us.
- Choose Save to save all your changes to your OneLogin application.
Debugging
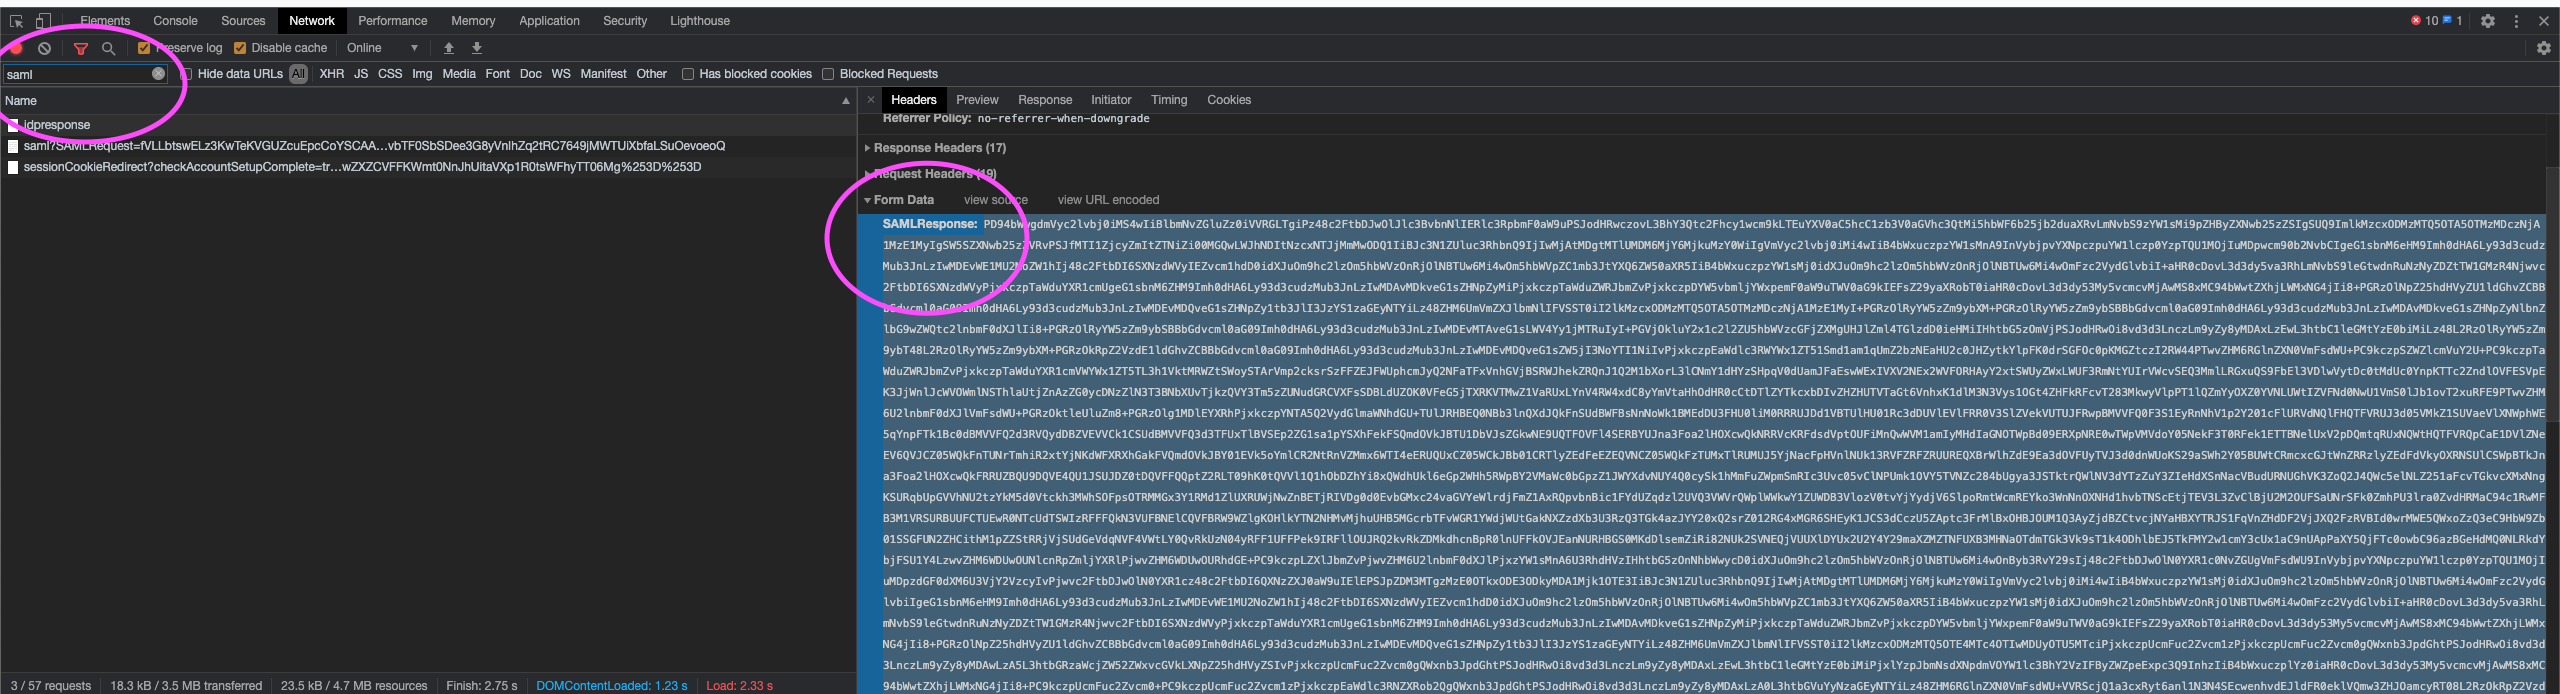
Debug SAML Assertions
The SAML login assertion request/response happens via the browser, and for security reasons, PactFlow cannot see it.
You can, however, extract the SAML assertion from your web browser during a login flow. For example, using most modern browsers such as Chrome perform the following steps:
- Open your developer tools console
- View the network tab and ensure "persist" or "preserve log" is enabled
- Head to your pactflow account:
https://<youraccount>.pactflow.io - Login via your IdP until you experience the issue
- Find the request to
https://pact-saas-prod-1.auth.ap-southeast-2.amazoncognito.com/saml2/idpresponse - Copy the
SAMLResponsevalue into a tool such as https://www.samltool.com/ to decode and view
Troubleshooting
1. Name not appearing in user management screens
You are missing the mappings for "First Name" and "Last Name", see Map the required SAML2.0 attributes in Setup.
2. "Invalid State/RelayState provided"
Your SAML provider has not been configured on the PactFlow side (please contact us if this is the case) or the metadata document supplied does not match your IdP.
3. "Invalid samlResponse or relayState from identity provider"
You have attempted to login via your IdP (IdP Initiated Login) which is not supported.
4. I've added an identity provider and see duplicate users
This means that a user who previously logged into PactFlow via username/password with the email "joe@pactflow.io" who then authenticates via Github, will be treated as a separate user with separate permissions.
To enable the merging of identities based on email address:
- Set the "Consolidate User Logins by Email" system preference
- Delete the duplicated user
- Attempt the federated login again. This will link the federated user to the original user, retaining the team assignments, roles, audit trail history, etc.
You can discriminate between users based on the "identity provider" column in our Users UI screen. To reduce the number of users in your account, you can disable (or delete) any users that no longer login via a particular IDP.
5. I've enabled SSO, can I disable login via username/password?
You can't make the username/password login dialog disappear, however only users that have been manually invited by email can login with this option. Inviting users is controlled by the user:invite permission, which by default is only available to Administrators. You can use this permission to create custom roles as needed to control the desired behaviour.
Note it is wise to retain at least one administrative user who can login with a username and password to address break-glass scenarios (for example, if your SSO provider is down or misconfigured).